
No-Knead Roasted Garlic Rosemary Bread – Bakery Style at Home 🍞🧄🌿
Introduction
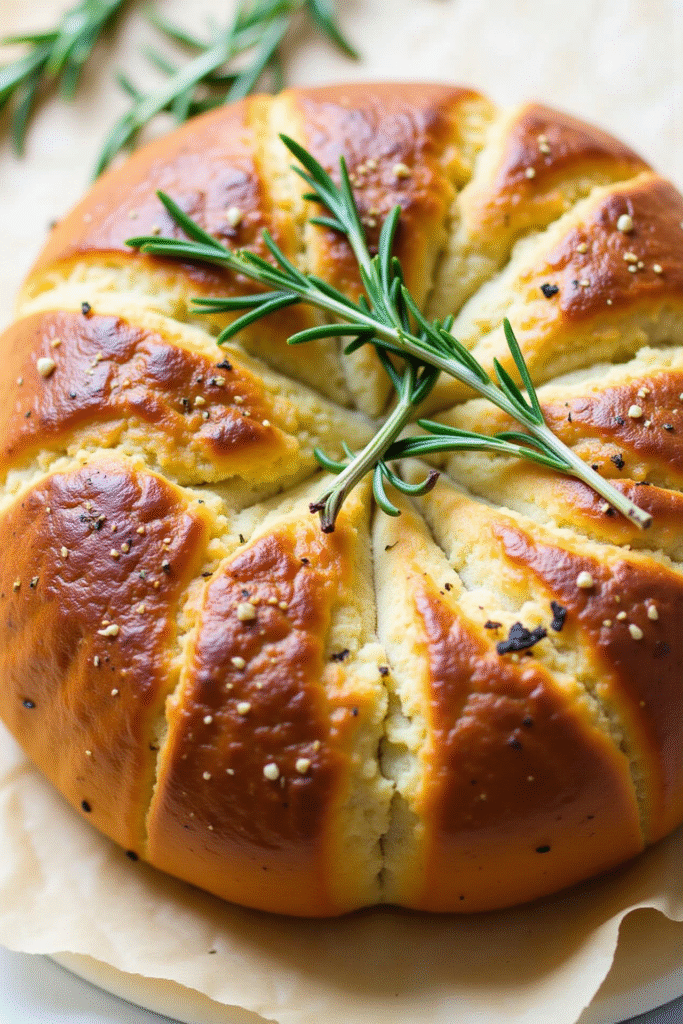
Few things are more satisfying than the aroma of fresh bread baking in your kitchen, especially when it’s infused with the robust flavor of roasted garlic and the fragrant notes of rosemary. This No-Knead Roasted Garlic Rosemary Bread delivers all the crusty, bakery-style goodness you crave—without the need for heavy kneading or complicated equipment. Whether served alongside soup, as the base for an epic sandwich, or simply enjoyed warm with a pat of butter, this bread is a guaranteed hit for home bakers and food lovers alike.
Why You’ll Love This No-Knead Roasted Garlic Rosemary Bread
This rustic loaf wins big on both flavor and simplicity. Roasted garlic adds a mellow, rich sweetness, perfectly complimented by the earthy, piney tones of fresh rosemary. The no-knead process streamlines active work, allowing the dough to transform with time—not effort—yielding a golden, crackly crust and a soft, chewy crumb reminiscent of artisan bakery loaves.
Getting the Most Out of Roasted Garlic and Rosemary
Roasting garlic transforms its pungency into a mild caramelized sweetness. Simply wrap a bulb in foil with a touch of olive oil and bake until soft and golden. Fresh rosemary offers depth, but dried rosemary works in a pinch—just use a bit less. Mixing both into the dough ensures every bite bursts with flavor.
Baking Your Bakery-Style Loaf at Home
After a slow fermentation, this dough only needs minimal handling. A hot Dutch oven (or heavy lidded pot) gives you that bakery-worthy crust at home—no expensive steam ovens required. Let the bread cool before slicing for that perfect, cohesive crumb.
Serving Suggestions for No-Knead Roasted Garlic Rosemary Bread
Pair warm slices with good olive oil or artisan butter. This bread also shines alongside hearty soups, as sandwich bread, or toasted for an aromatic bruschetta base. For dinner parties, serve as a savory centerpiece—simply tear and share!
Nutritional Information and Serving Size
This recipe yields one large rustic loaf, perfect for 8-10 hearty slices. Each serving provides around 160-180 calories (depending on how thick you slice), making it a delicious but not overly indulgent way to enjoy homemade bread.
Bakery-Style, No Knead – Recap
The magic of this bread is simplicity: minimal hands-on work gives you maximum flavor and artisan results. With just a few ingredients and some patience, you’ll enjoy a bakery-level loaf any day of the week.
Pair this dish with a perfect cup. I've been obsessed with Fresh Roasted Coffee - small-batch roasted and shipped within 24 hours of roasting. Use code NOBUZZ for 15% off their water-processed decaf, or save 30% on your first subscription order.
Ingredients
💡Meal Planning Tip: Save this recipe to instantly generate an organized shopping list. All your ingredients are sorted by grocery section—ensuring efficient shopping and stress-free meal planning every week.

No time to cook? These are my go-to. Prima - The First Ancestral Protein Bar is made with grass-fed beef tallow, organic raw honey, and zero seed oils—clean ingredients that actually keep you full. The Cacao flavor tastes like a brownie without the guilt.
Instructions
- Roast the Garlic: Preheat your oven to 400°F (200°C). Slice the top off a head of garlic, drizzle with olive oil, wrap in foil, and roast for 35-40 minutes until caramelized and very soft. Let cool, then squeeze the cloves out and mash into a paste.
- Mix the Dough: In a large bowl, combine flour, yeast, and salt. Add in lukewarm water, roasted garlic paste, olive oil, and chopped rosemary. Mix with a spoon or spatula until you have a shaggy, sticky dough. Cover tightly with plastic wrap.
- Ferment: Let the dough rest at room temperature for 12-18 hours (overnight works well). Dough should be bubbly and doubled in size.
- Shape: Lightly flour your work surface. Turn dough out and use floured hands or a spatula to shape it into a ball. Don’t knead—just gather! Place dough seam side down on a sheet of parchment. Cover loosely and let rise for 45-60 minutes.
- Preheat Your Oven: Place a Dutch oven (or heavy oven-safe pot with lid) inside and preheat to 450°F (230°C) for at least 30 minutes.
- Bake: Remove the preheated pot, lift the dough (using parchment) into the pot. Cover and bake for 30 minutes. Uncover and bake another 12-15 minutes until golden and crisp.
- Cool: Carefully remove from pot and let cool completely on a rack before slicing for best texture.
Weekly Meal Planning
This flavorful bread is a dream for weekly meal planning—enjoy it fresh, then use leftovers for sandwiches, toast, or croutons. Save and schedule this recipe to your personal meal plan, and CookifyAI will consolidate all your shopping needs for the week.
Planning Benefits:
– Automatically calculates ingredient amounts for all your planned recipes
– Categorizes items by grocery section for streamlined shopping
– Tracks what’s needed across multiple meals—no more forgotten rosemary or accidentally buying extra flour
– Makes meal prepping for the week less overwhelming and more organized
Pro tip: Schedule this bread alongside soups or main dishes to let CookifyAI merge ingredients and save you time and effort—keeping your pantry efficient and your meals delicious!
After a meal like this one, your teeth deserve some love. I've been chewing Larineco Chewing Gum—it strengthens enamel, freshens breath, and has 40,000+ happy customers. Way better than regular gum, and it actually supports your dental health.
Cook and Prep Times
Prep Time: 20 minutes (active)
Cook Time: 45-55 minutes
Total Time: 13-19 hours (including rise and roast time, most of which is hands-off)
Enjoy bakery-quality bread—with roasted garlic and rosemary aromas wafting through your home—any day you please!
Finished cooking? Reward yourself. Fresh Roasted Coffee delivers within 24 hours of roasting—because good food deserves great coffee. Save 30% on your first subscription.